1. The Android Simulator
1.1. Scope of This Tutorial
In this tutorial, we will focus on how to use the Android Simulator: the Android project structure. We will go through each setting step by step. As a result, you will learn what the Android Simulator actually does and how you use it.
2. Android Virtual Device Manager
2.1. Creating a new Android Virtual Device
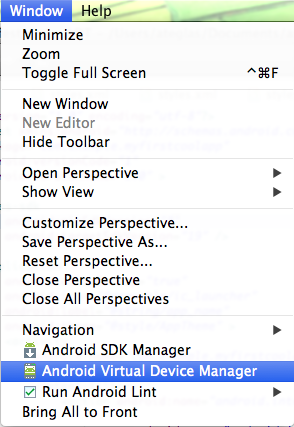
Image 1 displays the window in Android SDK how to select the Android Virtual Device Manager.
In order to configure the Android Simulator, you need to go to Window > Android Virtual Device Manager in your Android SDK. There, you see a window with the following settings on the right hand:
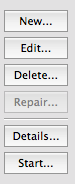
Image 2 displays the selections available of the Android Virtual Device Manager.
As the list of Android virtual devices is empty, you need to click on “New” to create a simulator.
2.2. Settings for the Creation of the Android Virtual Device.
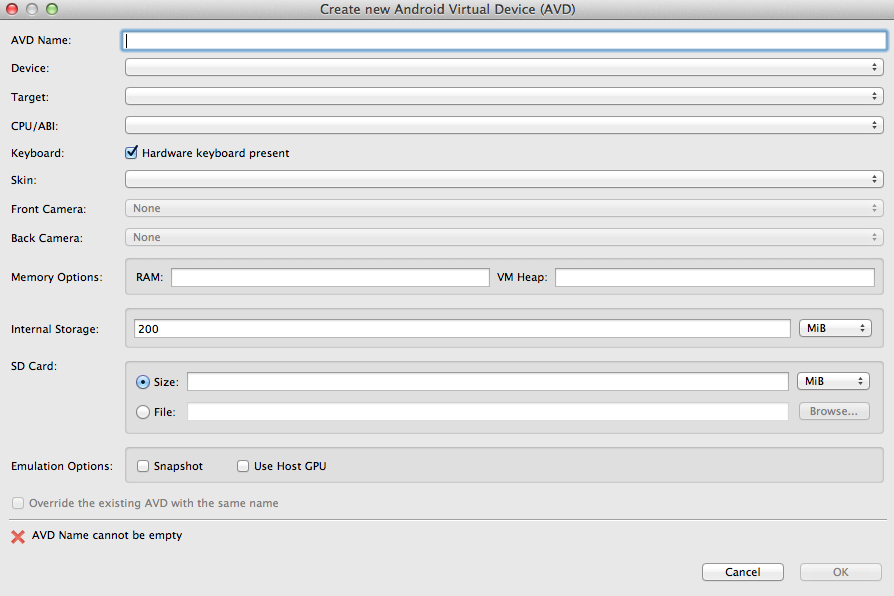
Image 3 displays the settings section of the Android Virtual Device Manager.
AVD Name: This is the name of the simulator you will use. The reason why you can actually choose a name for your Android simulator is that you can create various Android simulators. Thus, you need to name each one individually to create a distinction.
Device: This is a dropdown list of common Android devices your app should be tested on. However, as you can only choose one device now, choose one that resembles your current Android device you own (if this is the case). In this tutorial, we will go for the Nexus 5 by Google.
Target: The target is the Android version you intend to deploy your Android app on. Hence, if you want to make your app support various Android versions, you can choose different Android versions here so that your Android simulator will play it.
CPU / ABI: This setting is quite significant in terms of having a fast and responsive Android simulator. Please be aware of the fact that your Android SDK still does not possess the extra Android drivers and downloads necessary to make your Android SDK run fast on your computer. We will cover this issue in a separate tutorial. In our case, just choose ARM if you cannot choose Intel Atom.
Skin: This setting is not relevant for this tutorial. This gives you the mechanism to offer specific mechanisms of a particular Android device. However, in this tutorial, we intend to cover general aspects of Android development. As a result, we select “NO skin.”
Front Camera and Back Camera: Both settings are not irrelevant. As this is a simulator, you cannot use the front and back camera of the actual device. Hence, select “none.”
Memory Options: This setting depends on the machine you use for development. In this tutorial, we will use 2048 MB RAM in order to give the simulator sufficient RAM to operate and not to lag while we are using the simulator. Also, we give 64 RAM for VM heap.
Internal Storage: This field indicates the amount of disc space you reserve for Android simulator to use. Here, we will give the simulator 200 MB so that the simulator can actually store some information on our disc. Bear in mind that if you create an app that requires a lot of disc space, you would have to increase this setting here.
SD card: This filed refers to the SD card an actual Android device could utilize. As we use a simulator, we leave these settings blank.
Emulation Options: We select “Use Host GPU,” because GPU power gives better performance on the Android device. In other words, using the GPU instead of the CPU makes the simulator react faster.
As we are done with setting the Android Virtual Device, we click on “OK” and we create the virtual Android device.
2.3. Launching the Android Virtual Device
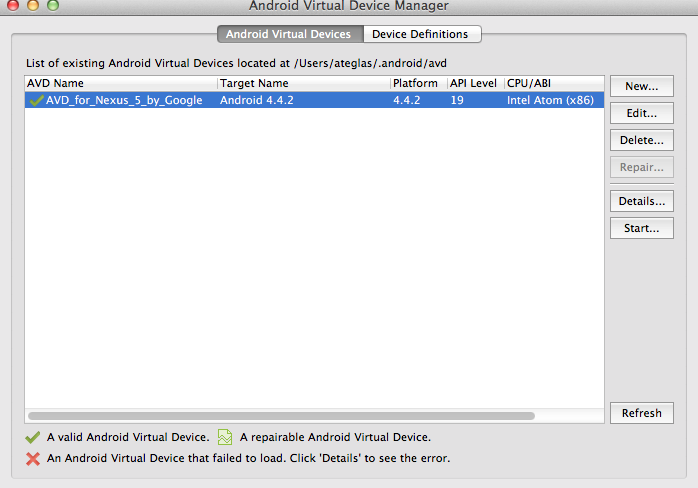
Image 4 displays the list of Android Virtual Devices available in the Android Virtual Device Manager.
In order to launch your configured Android simulator, click on “Start.” Now, you see another window, displaying “launch options.” Leave all default settings, and click on “Launch.”
It takes a couple of seconds or a minute to launch the Android simulator. As soon as the Android simulator is finished loading, you should see the following:
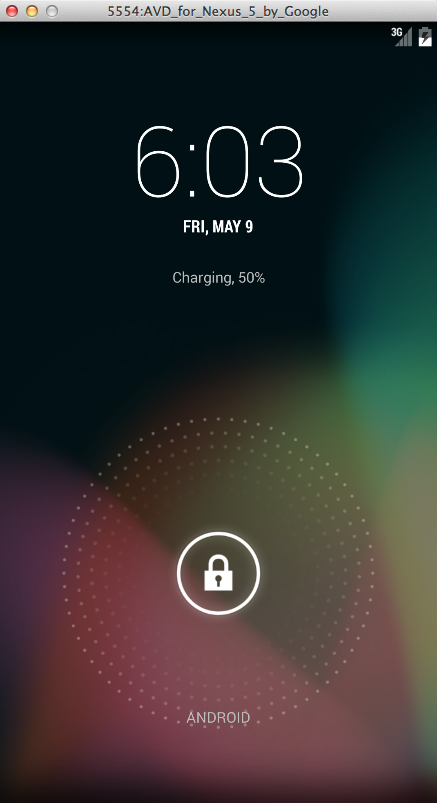
Image 5 displays the Android Simulator after having launched completely.
Now, you can see the fully launched Android simulator. In order to “open” it, swipe the lock with the mouse cursor to the outer circle. Then, you can use your Android virtual device.
Finally, you have set up the Android simulator and you are now ready to go to the actual developing of the app. However, please do not forget that you need to leave the Android simulator open and do no close it now. If you close it, you need to re-launch in order to use it. Therefore, make sure that you do not close the Android simulator.
2.4. Compiling the App
Now, as we intend to see our app in the Android simulator, we need to compile and deploy it there. In order to do so, go to toolbar where you see the green bubble with an arrow indicating to the right. See picture below:
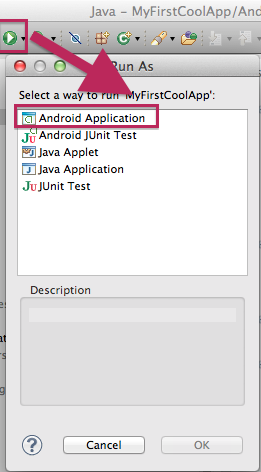
Image 6 displays how to launch your Android app.
After clicking on it, another window pops up asking you how you want your app be run. Select Android application.
The Android SDK is working and you can see this by looking at the lower right corner; the Android SDK indicates there what the progress on the compilation process is.
When the Android SDK is done, another window pops up:
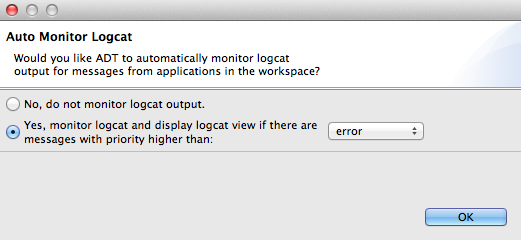
Image 7 displays the window asking for permission to use LogCat of the Android SDK.
This window asks you for if you want to use LogCat or not. LogCat is a very useful tool in order to see logs about the internal operating system process and the logs your app (if you had implemented some) displays. As a result, leave the default setting and click on “OK”.
A couple of seconds later, you should see this:
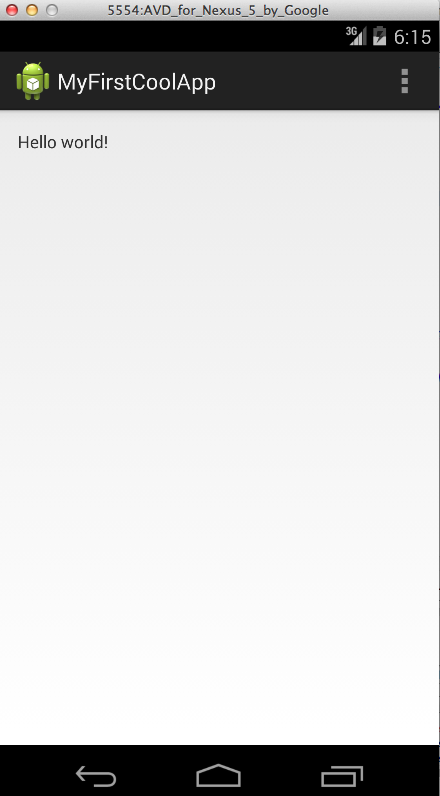
Image 8 displays your Hello World Android app fully launched in the Android Simulator.
Voilà, congratulations, you have successfully compiled and deployed your first Android app on the Android simulator.