1. The Android Project Structure
1.1. Scope of This Tutorial
In this tutorial, we will focus on what the Android SDK’s Package Explorer displays: the Android project structure. We will go through the different files, classes, images, folder structures and their purpose in an Android app. As a result, we will talk about the content displayed in the red frame of the image below:
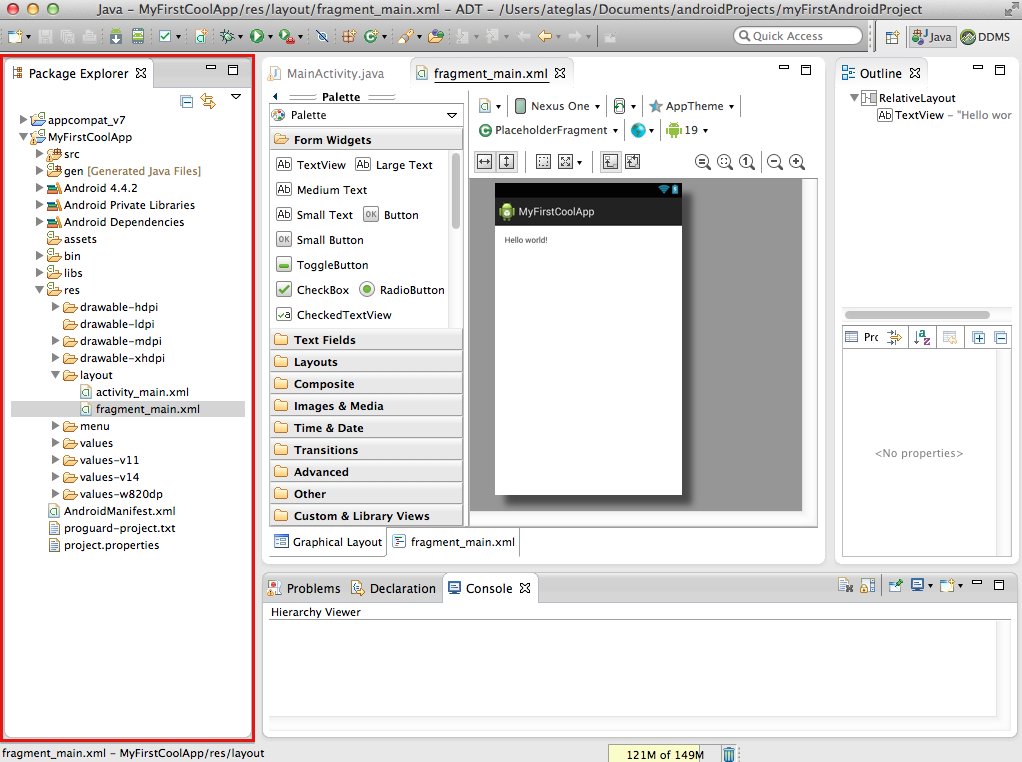
Image 1 displays the package explorer highlighted in red on the left hand side.
2. The Structure and the Content of an Android App
In the picture below, the files of the actual Android app we had generated are located in the red frame:
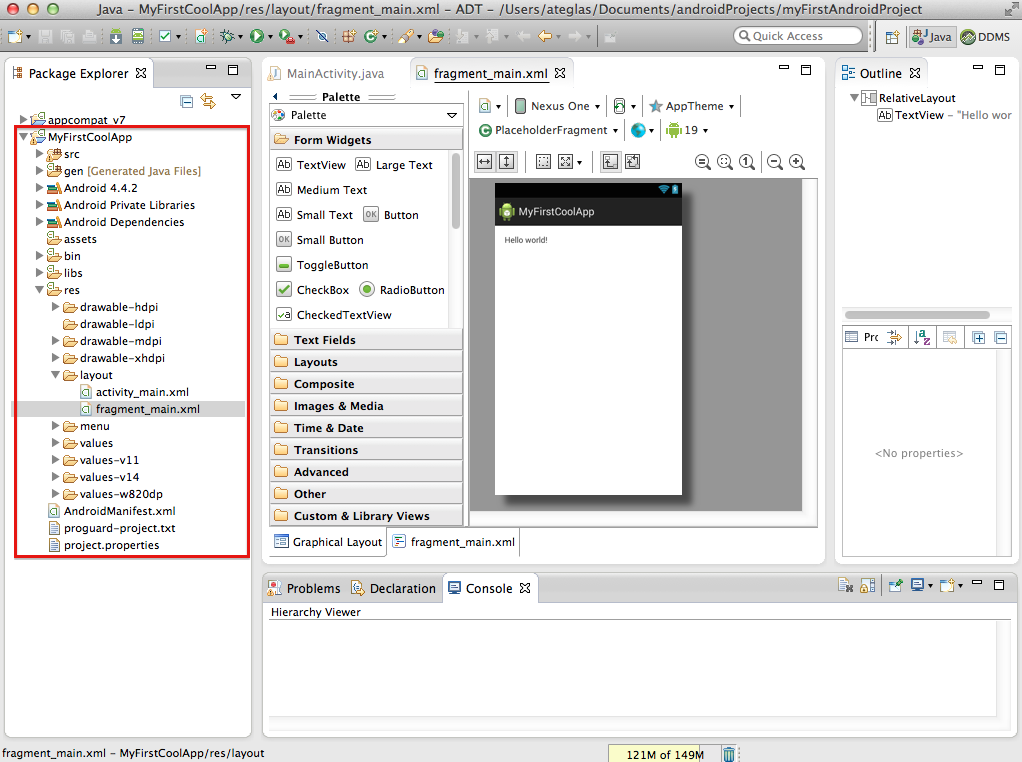
Image 2 displays the project structure of your Android app highlighted in red on the left hand side.
2.1. The folder “src”
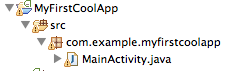
Image 3 displays the source (“src”) folder of the Android project.
The folder “src” is the abbreviation of “source,” indicating that this is the place where you store your actual Android Java classes. In other words, when you develop your app and when you add your classes, this is the place where you store them.
As we had created an Android app with an Activity, you can see its source code representation in the image above, the MainActivity.java class.
2.2. The folder “gen”
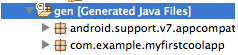
Image 4 displays the gen (“Generated Java Files”) folder of the Android project.
The folder “gen” is the abbreviaton for “generated,” meaning that in this folder the Android SDK stores the Java classes necessary for internal memory references of certain GUI elements.
2.3. The Java library dependency “Android 4.4.2”
![]()
Image 5 displays Java library dependency (Android 4.4.2) of the Android project.
This is technically not a folder, it is a Java library. This library is the actual Android operating system used for development. By having this .jar file there, you can develop Android apps against this library, utilizing all the features and functionalities this specific Android version possesses.
2.4. The folder “Android Private Libraries”

Image 6 displays the Android Private Libraries of the Android project.
The Android Private Libraries section is not a folder, it is a section for holding private Android libraries. This means that this is the place where you can see what other private Android libraries are used in your Android app. In this case, we have the android-support-v7-appcompat.jar and the android-support-v4.jar. android-support-v7-appcompat.jar provides support for the Action Bar user interface design pattern. It also includes support for material design user interface implementations. In addition, this library also depends on another one: the android-support-v4.jar, which is also a library providing the largest set of APIs compared to other libraries. For instance, support for application components, user interface features, accessibility, data handling, network connectivity, and other development utilities. If you also use external libraries from third-party developers and if those developers offer their libraries only in a compiled form, that library would appear here, too.
2.5. The folder “Android Dependencies”
![]()
Image 7 displays the Android dependencies of this Android project.
The Android Dependencies section is the place where you can see which are the dependencies implemented in your app. For example, if you have other Android projects in your workspace, functioning as a library for your app, your app (which in this case would be the main project in the workspace) requires dependencies references. In this case, it is a compiled version of the Android project that functions as a library, but it is not put in the other sections before, but here under “Android dependencies.”
2.6. The folder “assets”
![]()
Image 8 displays the assets folder of this Android project.
In this case, the folder assets is empty; however, this folder is a very crucial one. This folder is the one where you store all the files (sound files, pdfs, movie files, images, etc.) that you need to implement in your app.
2.7. The folder “bin”
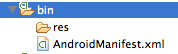
Image 9 displays the bin folder of this Android project.
The folder bin is the place where the Android SDK stores the “pre-finally compiled Java classes.” Think of it as a separate section of your app where the Android SDK needs to do compilation jobs in order to create a final, working Android APK.
2.8. The folder “libs”
![]()
Image 10 displays the libs folder of this Android project.
The “libs” folder is a folder where the Android SDK places compiled Java libraries.
2.9. The folder “res”
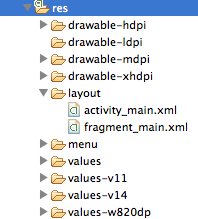
Image 11 displays the res folder of this Android project.
The folder “res” stands for “resources” As the term already indicates, this is the folder where you administer all the files that function as “resources.”
2.9.1 The “drawable” folders
The drawable folders are the ones that are the ones where the Android operating system stores its launcher icon images for different types of Android devices. For example, there are devices for small, normal, large, extra large, and extra extra large resolutions. Also, for each size of smartphones and tablets, the density of the screens may vary.
2.9.2. The folder “Layout”
The “layout” folder is one that you will deal with on a regular basis. It is the folder holding the files responsible for representing the GUI of your app. To be more specific, the files stored there are linked to certain activities and fragments. We will come across the distinction between the two in future tutorials. For now, just remember that you administer the GUI of your app here. The GUI is stores as XML files.
2.9.3. The folder “Menu”
The “menu” is a folder where the main menu, such as navigation elements, are stored. They are also GUI elements, but they are separated from the layout files, as the layout files only deal with activities and fragments.
2.9.4 The folders “value”
The value folders store xml files responsible for different tasks, such as the definition of colors and strings. Also, they store three xml files, whereby each xml file does a different job: dimens.xml, strings.xml, and styles.xml.
2.9.4.1. Dimens.xml
The source code of dimens.xml file is this:
<resources>

    <!-- Default screen margins, per the Android Design guidelines. -->

    <dimenname="activity_horizontal_margin">16dp</dimen>

    <dimenname="activity_vertical_margin">16dp</dimen>

</resources>
As you can see, there is the tag “dimenname” referring to “activity_horizontal_margin and vertical_margin. Dimenname means that you declare what kind of dimension you intend to declare. In this case, the horizontal and vertical dimensions of the activity are defined. And these dimensions are defined by a dimension value, namely, 16dp. Android defines a dimension as a number followed by a unit of measure, which we have here in this case. Also, bear in mind that “dp” stands for “density-independent pixels. A dp is an abstract unit that is based on the physical density of the screen. This means that 1 dp refers to a 160 dpi (dpots per inch) screen, whereby 1 dp approximately is 1 px. As a result, if the Android device has a screen with a higher resolution, thus having a higher DPI, the pixels utilized in order to create this 1 dp is scaled up. If the screen has a lower resolution, the opposite is the case. The reason why Android uses this way of controlling the dimensions of GUI elements on Android devices is that it offers better consistency and scalability for the great array of various Android devices available on the market.
Moreover, “DP” is not the only unit of measure at your disposal. You can also use sp, pt, px, mm, or in.
2.9.4.2. Strings.xml
The source code of strings.xml file is this:
<?xmlversion="1.0"encoding="utf-8"?>

<resources>

    <string name="app_name">MyFirstCoolApp</string>

    <string name="hello_world">Hello world!</string>

    <stringname="action_settings">Settings</string>

</resources>
Please remember that this file is a very important one that you will be dealing with on a regular basis. The file is the one where you store your strings. It is also used in order to provide localization and internationalization for your Android app. For example, if you intend to make your app multilingual, say English, Spanish, and German, you do not intend to put for each language separate strings into the Java source classes. You put the strings for each different language in a separate strings.xml file. The tag “string name” is used to show to Android that you declare here a string; this tag is followed by the actual id name of the string you want to use. In the case above, you have two strings, “app_name” and “hello_world.” Thus, the string name “app_name” refers to the string “MyFirstCoolApp” and the string name “hello_world” refers to the string “Hello World!”. Please pay attention to this very important difference, in particular in the case of the string name “hello_world.” If you intend to use a string from the strings.xml file, you will make a reference to this string name and not the actual string. This means that your Java classes will use the string name “hello_world” in order to display “Hello World!”, and you will not use the pure string “Hello World!.” By using the string name, you make it possible to change the actual string and not the reference. By this, maintaining your code strings-wise is, therefore, more efficient and less time-consuming.
2.9.4.2. Styles.xml
The source code of styles.xml file is this:
<resources>

    <!--

        Base application theme, dependent on API level. This theme is replaced

        by AppBaseTheme from res/values-vXX/styles.xml on newer devices.

    -->

    <stylename="AppBaseTheme"parent="Theme.AppCompat.Light">

        <!--

            Theme customizations available in newer API levels can go in

            res/values-vXX/styles.xml, while customizations related to

            backward-compatibility can go here.

        -->

    </style>

    <!-- Application theme. -->

    <stylename="AppTheme"parent="AppBaseTheme">

        <!-- All customizations that are NOT specific to a particular API-level can go here. -->

    </style>

</resources>
The purpose of this file is to dermine the format and look of your app, meaning its UI. Furthermore, a style is a collection of properties specifying the look and format for a View or window. This means that a style defines font size, background color, font color, height, and so on. Think of it as being the equivalent of a CSS file from web development.
2.9.5 The folders “value-v11″ and values-v14”
In both cases, these folders are present in this project because we had selected to support older Android versions. For example, we support Android devices running on Android AP8+. As there were major differences or changes during the course of the evolution of Android, the default theme templates were changed for Android API 11+ and API 14+. In order to provide backward compatibility, these folders with their respective styles.xml files were automatically generated. However, in our case, we will not deal with them here. These folders are only interesting to you if you have to make specific changes to the look for each theme in the future.
2.10. AndroidManifest.xml
The AndroidManifest.xml as source code looks like this:
<?xmlversion="1.0"encoding="utf-8"?>

<manifestxmlns:android="http://schemas.android.com/apk/res/android"

    package="com.example.myfirstcoolapp"

    android:versionCode="1"

    android:versionName="1.0">

    <uses-sdk

        android:minSdkVersion="8"

        android:targetSdkVersion="19"/>

    <application

        android:allowBackup="true"

        android:icon="@drawable/ic_launcher"

        android:label="@string/app_name"

        android:theme="@style/AppTheme">

        <activity

            android:name="com.example.myfirstcoolapp.MainActivity"

            android:label="@string/app_name">

            <intent-filter>

                <actionandroid:name="android.intent.action.MAIN"/>

                <categoryandroid:name="android.intent.category.LAUNCHER"/>

            </intent-filter>

        </activity>

    </application>

</manifest>"
The AndroidManifest.xml is probably one of the most important files across any Android app. This file is the place where you make major settings. Let us take a closer look at the content of this file:
package: This tag indicates the name of the package name of this Android app. Please read more about the package name in the previous tutorial.
android: versionCode: The version code is the integer indicating the internal build version number of your app. For example, you might be constantly improving your app and, therefore, you also need to keep track of the different changes you made to your source code. It is best practice to introduce a versioning scheme for your app / project by making the rules of how to name the different versions of source code of your app. Hence, if you have a very early version of your app, you can use “0.6” as versionCode in order to indicate that this is the internal version number of the current app. Please remember that the versionCode does not have to be the same as the versionName. However, the versionCode is a very important value. As it is an integer, it is used by the Android operating system and by Google’s PlayStore to evaluate if there are new updates available of your app.
android:versionName: The versionName is the place where you declare the actual version number of your app. Please bear in mind that this version number is public, meaning that it will be displayed to any user / customer in Google’s PlayStore and before the app installation process. Also, this versionName is a string (remember, the versionCode is an integer!) value having a more “representative role” in terms of the current version of your app.
android:allowBackup: This tag indicates if you want to make backups of your app possible or not. If you leave it with your default setting, your app will be backed up on Google’s cloud servers. In case you lose your Android device or if you purchase a new one, you can, therefore, get your backup on your new device and you can continue using this app. If you set it to “false”, no backup will be created.
android:icon: This tag is used to tell the Android operating system where it can find the launcher icon displayed on the Android device.
android:label: This tag indicates what your app is called.
android:theme: this tag indicates which theme you use for your app.
activity > android:name: This tag makes reference to your main activity, meaning how Android can find this class. Here, you enter the name.
activity > android:label: This tag makes reference to the name of your activity, meaning that you decide that this particular activity shows its name
intent-filters will be discussed in future tutorials. Hence, leave the default settings.
2.11. Proguard-project.txt
The purpose of the proguard-project.txt file is to provide the possibility to obfuscate the class names, method / function names, variable names, and so on in the compiled Android app. You may want to use this file in the future in order to make sure that no potential copyright infringer decompiles your app, scrutinizing your classes and revealing too much information to third-parties. However, we will not talk about the specifics here. Check out our future tutorials on that.
2.12. Proguard.Properties
The purpose of the proguard.properties file is to give the means to project settings. For example, you can decide which Android API version should be used for compiling, which other libraries as dependencies should be used, etc.