Info: This tutorial is based on Xcode 7.1 beta (7B60) and baseSDK tvOS 9.0
1. Scope of this Tutorial
Moreover with this knowledge, you will be able to jump start with tvOS app development.
2. Setup your first tvOS App Project
2.1. Make sure you Have the Correct Xcode Beta Version
The following step takes for granted that you have already downloaded the latest Xcode beta version (from September 9, 2015) from Apple’s website.
Step 1: Open up the latest Xcode beta version, namely version 7.1 beta (7B60). The version number is highlighted in the picture below. If you do not see the same version number as illustrated in the image below, please go back to Apple’s website and download that Xcode version.
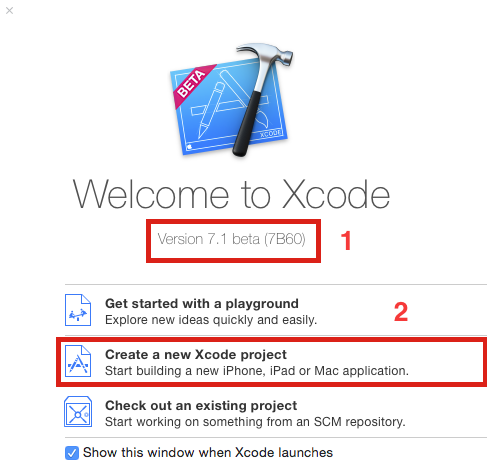
Image 1 depicts how to create your first tvOS app with the latest Xcode 7.1 beta
2.2. Select tvOS Template
If you have the correct Xcode version installed, please click on “Create a new Xcode project.” If you are already familiar with iOS / Mac OS app programming, then this step is the same in case of tvOS apps.
Step 2: In the next window, you will see the following:

Image 2 depicts the list of templates available for the different types of apps
If you are familiar with iOS / Mac OS development, then you will find out that the list of templates available has been increased by one: “tvOS template.” Therefore, in order to create your first tvOS app, you need to select the “tvOS” template highlighted in 3). Next, you will select a “Single View Application” as shown in 4).
2.3. Configure your tvOS Project
Step 3: In the next window, you will see the usual procedure in terms of how to name your project and what other options you intend to select.
As depicted in the picture below in 5), call your first tvOS app “tvOSHelloWorld,” because this will be a Hello World app for tvOS. 
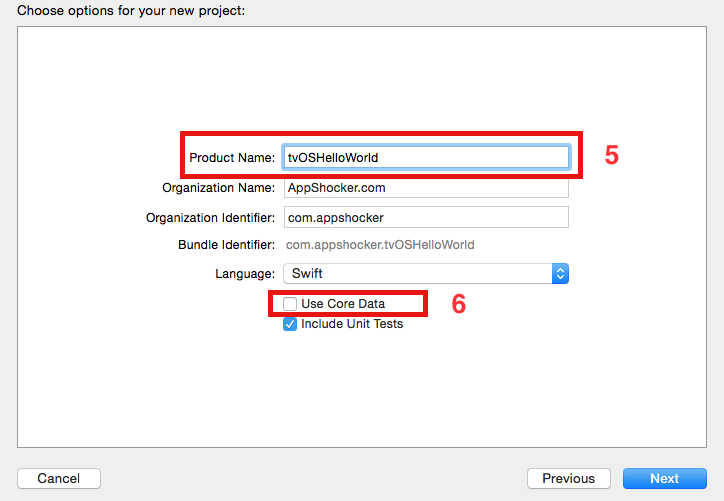
Image 3 depicts how to name your first tvOS app.
By default, Xcode has the checkbox “Use Core Data” checked. However, as we will not use any Core Data mechanisms (if you are new to iOS development in general, then you will learn more about Core Data in a few future tutorials on this website), please uncheck this as in 6). In order to proceed, please click on the “Next” button at the bottom of this window.
3. The tvOS Project Structure
3.1. Main Project
Step 4: Now, let us analyze what the actual project structure of a tvOS app looks like. When you open up the main project, namely “tvOSHelloWorld” in this case, you will see that your tvOS project structure does not look much different in comparison to a regular iOS app structure. See screenshot below:
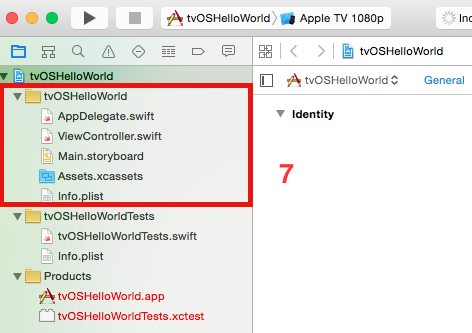
Image 4 depicts the app structure of your first tvOS app.
Well, you may think that you only still the “surface” of the tvOS project structure. Hence, it is sensible to take a look at what is actually “under the hood” of the two classes generated by default: AppDelegate.swift and ViewController.swift. Therefore, let us start off with the AppDelegate.swift:
3.2. AppDelegate.swift
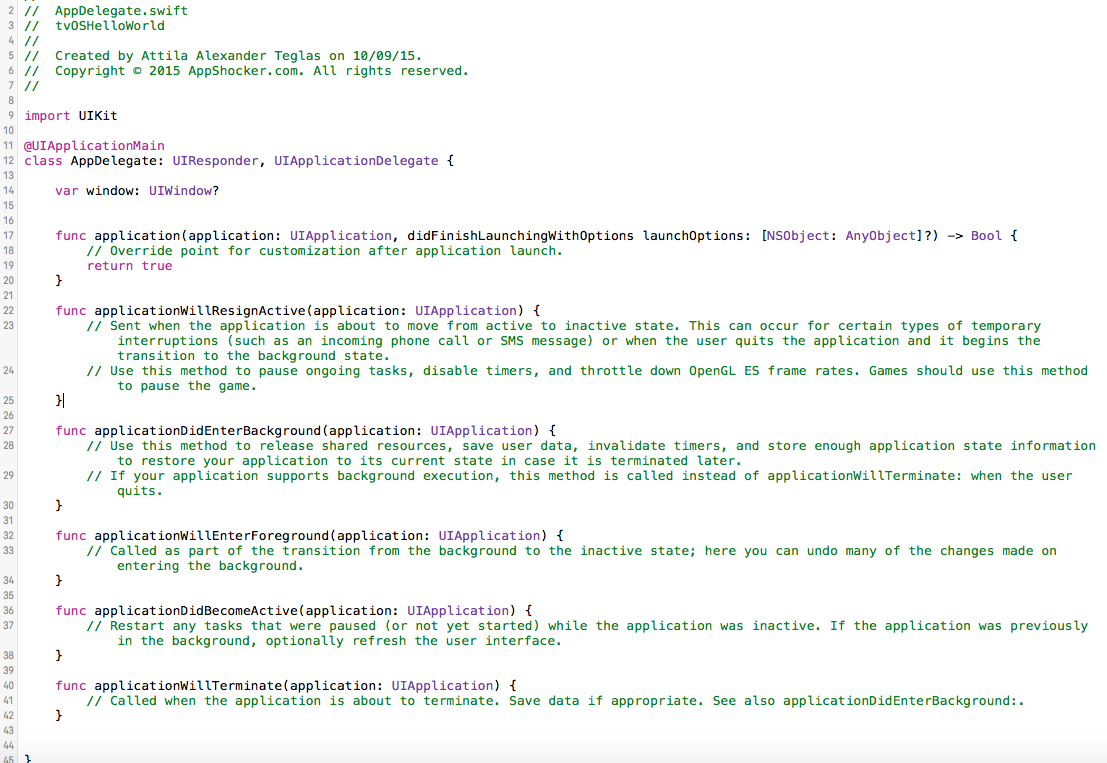
Image 5 depicts the content of the AppDelegate.swift generated by default when you create your first tvOS app.
As you can see, this AppDelegate.swift does not look much different to a regular AppDelegate.swift of an iOS app generated by default. Maybe, the ViewController.swift file may show some tvOS-specific code. Thus, let us analyze it:
3.3. ViewController.swift
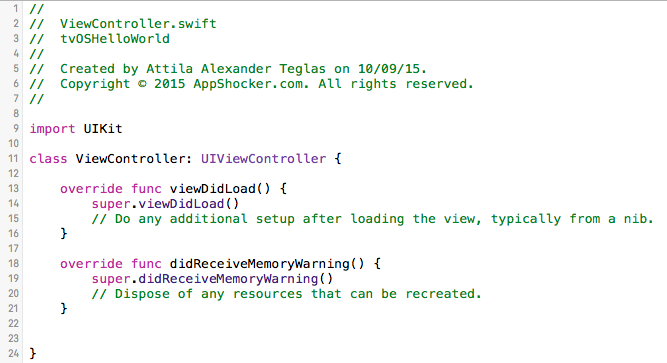
Image 6 depicts the content of the ViewController.swift generated by default when you create your first tvOS app.
Again, this ViewController.swift generated by default for a tvOS app is also identical in comparison to a regular ViewController.swift generated by an iOS app. Hence, on the one hand, you may think that this is quite helpful, because you may deduce that the structure of a tvOS ViewController is the same as in case of a regular iOS app. However, on the other hand, it seems to be a little too early to tell that they are identical, because we have not analyzed the specifics of a tvOS app in detail. Therefore, let us continue analyzing what we have in our tvOS project.
3.4. Main.storyboard
If you are familiar with iOS development, so you know that the storyboard is a fundamental mechanism in order to display UI in your iOS apps (apart from nibs and creating UI elements programmatically). Therefore, let us see what the storyboard looks like:
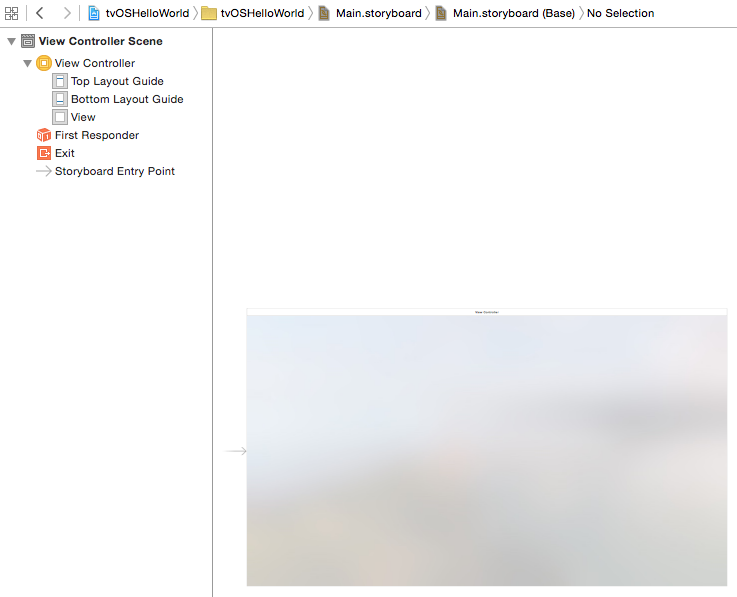
Image 7 depicts a default main.storyboard of a tvOS app.
As you can see, the Interface Builder (this is the embeeded program in your Xcode in order to create the UI of your app, in case you are new to iOS development) displays this storyboard relatively similar to a regular iOS storyboard. However, the main difference is visible on the right hand side of the picture: the default ViewController is relatively large in comparison to a regular ViewController in a storyboard displayed of an iOS app. Moreover, you see that the background image is blurry and looks – in my opinion – quite neat. Therefore, we see that this is one major difference in terms of tvOS development: the UI is quite different (as you may have expected).
3.5. Assets.catalog
Next, we are still curious and we would like to know what differences the Assets.catalog provides:
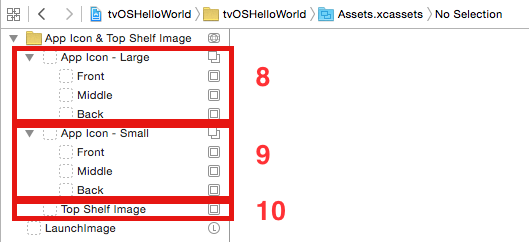
Image 8 depicts a default Assets.catalog of a tvOS app.
Here, you see that we encountered another major difference. By default, the assets catalog has the following sub-divisions:
8) App Icon – Large > Font, Middle, Back
9) App Icon – Small > Font, Middle, Back
and 10) Top Shelf Image
I still need to analyze what “large” and “small” in this case really means; however, in case of “top shelf image”, this is the image you need to provide so that users can see a large picture of your app on the “top shelf” of your Apple TV. If you still did not understand what it is, do not worry, there will be a tutorial on that.
In general, you see that you need to invest a little more work in completing your tvOS app, because you need to comply with various new image requirements.
However, we are not done yet; we, therefore, continue browsing through the options available.
4. Apple TV Simulator aka tvOS Simulator
4.1. How to Run the tvOS Simulator
One of the most important options to know is how to actually use the Apple TV Simulator. In the following screen, you see the options Xcode provides in order to run your tvOS app:
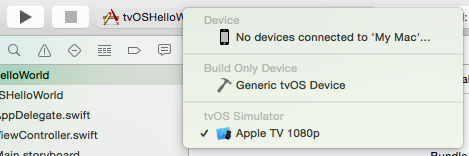
Image 9 depicts the selection list of how to run your tvOS app.
Here, you see the three selections:
- “Device”
- “Build only Device”
- “tvOS Simulator”
As there is no new Apple TV hardware version out as of September 10, 2015, we can only use the tvOS Simulator in order to actually try out our tvOS apps. Therefore, leave the already checked selection as it is so that we can run our tvOS app in the tvOS Simulator.
4.2. tvOS App in the tvOS Simulator
It takes a little until you can see the following:
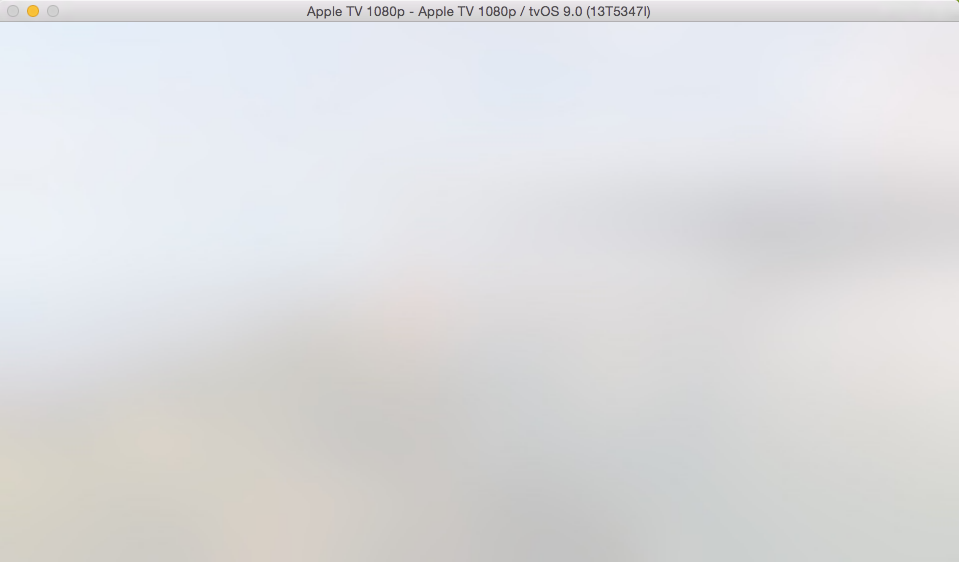
Image 10 depicts the tvOS Simulator.
As illustrated, this is your blank tvOS app run in the tvOS Simulator. Obviously, as we have not added any functionality and no UI elements to our tvOS app, the app is completely “empty” and only this blurry background image is displayed.
4.3. tvOS Simulator Settings – Device Type
Now, let us take a glance at what other options the tvOS simulator provides. When you go to the bar at the top of the tvOS Simulator, meaning where you normally find selections, such as “Find,” “Edit,” “Help,” and so on, then you will see the following:

Image 11 depicts the tvOS Simulator settings.
The interesting tab is “Hardware” where you can go to “Device.” There, you can see what kind of devices you can select and what the tvOS simulator actually offers. In this case, you can see that we have the tvOS 9.0 Simulator and it uses an AppleTV 1080p. This means that probably in the future, Apple will release different AppleTV models with higher resolution, such as 4k and so on. However, for now, we only have this simulator model at our disposal.
4.4. tvOS Simulator Settings – Apple TV Remote
Moreover, if you take a closer look at the dropdown list of “Hardware,” you will see that there is the option “Show AppleTV Remote.” When you click on this as in 11), the AppleTV Remote will pop up. In order to use an AppleTV, you need to have a remote so that you can switch through channels and select movies. In this case, gives you three options:
- Menu
- Screen
- Play
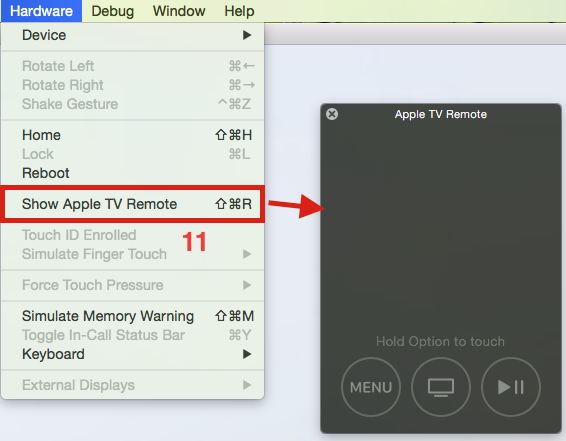
Image 12 depicts the tvOS Simulator remote control.
Hence, if you see your app in the AppleTV Simulator, you can go back to the main menu via clicking in “Menu” of the AppleTV Remote. Consequently, the AppleTV Remote is the central point and tool you use in order to get from your app back to the central menu. In the next tutorials, you will see how to use the AppleTV Remote in tandem with your tvOS apps.
5. tvOS App – Hello World
Now, we have seen enough about the new features of Xcode, the tvOS project structure, and the tvOS Simulator. In order to actually interact and find out how it is to program a tvOS app, we go back to our project, opening the Main.storboard.
5.1. Adding a Label
First, in order to create a Hello World tvOS app, we need to have a label. Please go back to the Main.storyboard as depicted in 12). Then, go to the right hand side to the search field where you can look for UI elements. Introduce the term “Label” and then you see 13). Drag and drop this “Label” object onto the view of the ViewController as depicted in 14).
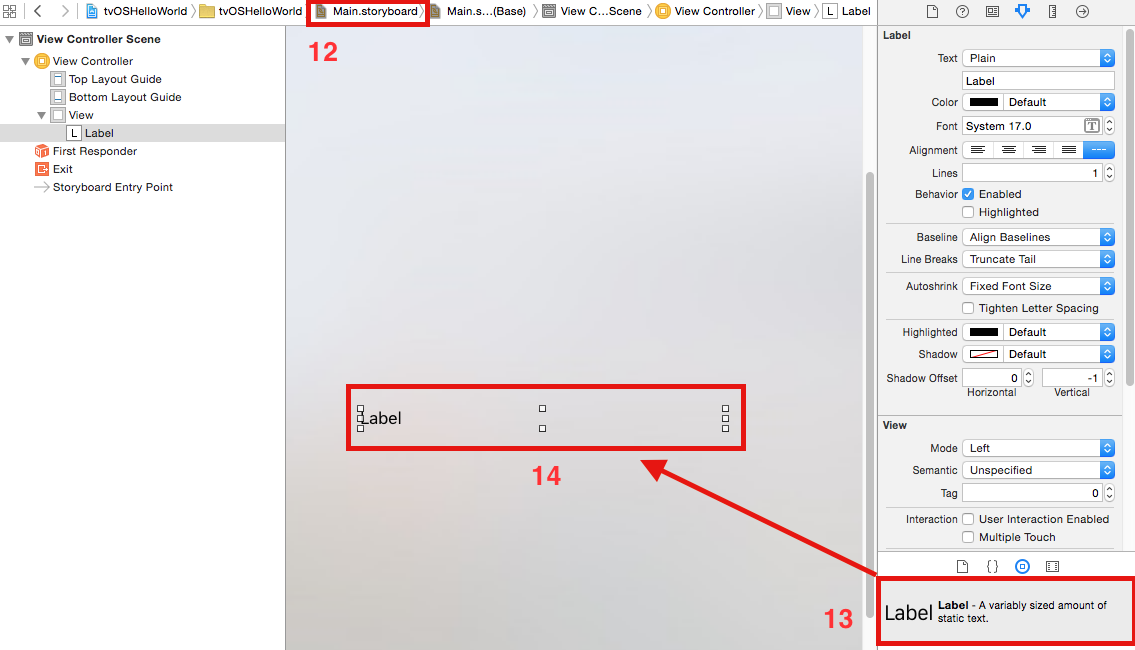
Image 13 depicts how to add a label to your tvOS app.
5.2. Changing the Size of the Label
However, as this is not sufficient, we still need to the following two things:
- Change the font size of the label
- Adding a “Hello World” text to the label
First, click on the label so that it is highlighted, then to the Label property “text” as it is illustrated in 15). Add the text “Hello World” there. Second, go to the property where it says “Font – System”. Change it to font size “70” as shown in 16). We choose “70”, because a TV has a relatively large screen size in comparison to an iOS device. Hence, we also need a large font size. When you save both changes, then the end result will be label as shown in the picture below:
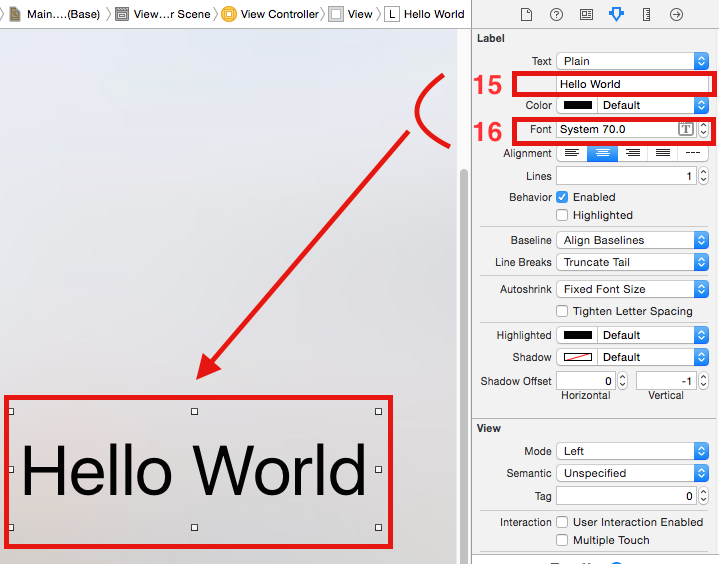
Image 14 depicts how to change the text and the font size of the label.
Now, let us run our tvOS Hello Word app again and it will show the following:
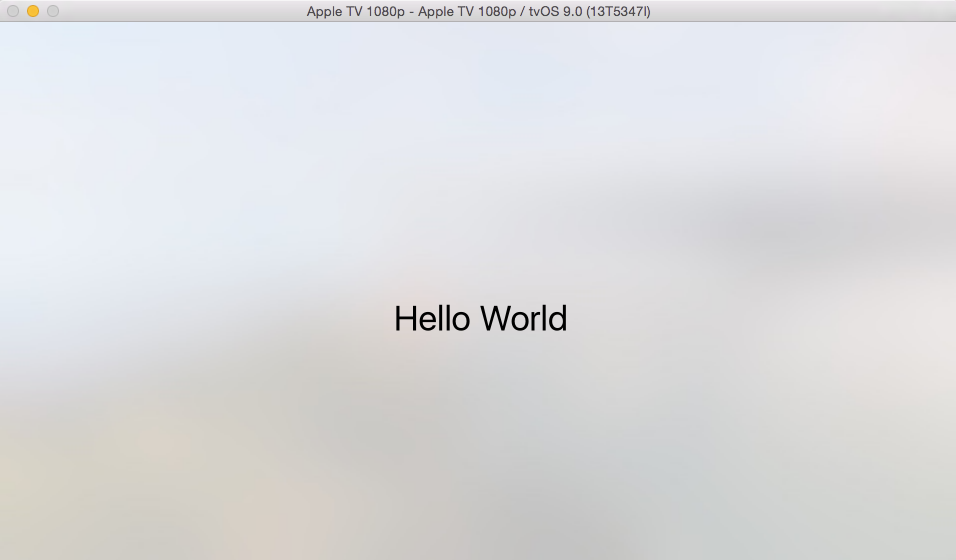
Image 15 shows the final tvOS Hello World app.
6. Interactivity – Changing the Text of the Label
As I am not a great fan of only displaying some Hello World text in my first tvOS app, I will extend this tutorial in terms of functionality. In the following, we will find out how to add a button to our tvOS app. By clicking on a button of the AppleTV Remote, the user will be able to change the text of the label from “Hello World” to “Visit www.appshocker.com.”
6.1. Adding a Button
Next, go back to the Attributes Inspector and go to the search field below again. Enter the term “button” and you will see the UI element in 17). Drag and drop it onto the view of the ViewController of your tvOS Hello World app and change the name of the button to “click” (18). As in case of 15), you have to click on the button, go to the property Button > Title where you see an empty field. There, you enter the name “Click.”

Image 16 shows how to add a button to your tvOS app.
6.2. Creating an IBOutlet for the Label
Now, before we can actually make use of the button, we have to take care of the label first. This is because of the fact that when the user clicks on the button, the text property of the button will be changed. Hence, we need a reference to the label object in code. This reference is called “IBOutlet”. In order to do so, please click on the label as in 19), drag and drop it into the ViewController code as shown in the picture below. Then, the window regarding IBOutlet configuration pops up. There, enter the name of the label, namely “helloWorldLabel.” as in 20). Please bear in mind that this name only refers to the label object and not the actual text displayed via the hello world label. Finally, click on connect so that you connect the UI element with the actual code as in 21).

Image 17 shows how to create an IBOutlet for the label.
In the end, the Swift code for the IBOutlet looks like this in the ViewController.swift:
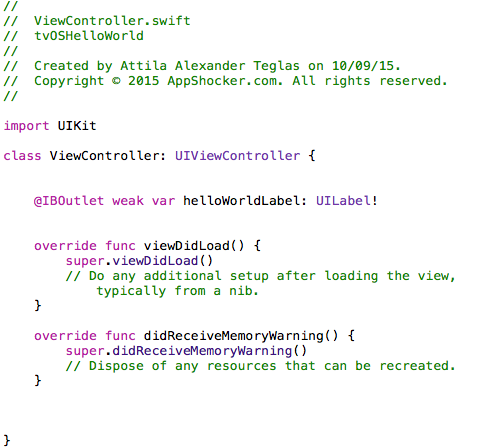
Image 18 illustrates the IBOutlet label code.
6.3. Creating an IBAction for the Button
Lastly, we need to make sure that the button actually triggers the change of texts of the label. In order to do so, we need to basically do the same as in case of the label, but with certain differences. First, click on the button as in 22) and drag and drop it onto the ViewController.swift. Again, the window with button properties appears. Very importantly here: you need to change the type of connection of this UI element, namely to “Action” as in 23). This is very essential, as not doing this propertly will probably result into creating an IBOutlet, which we do not need in this case. Second, give the IBAction a name, namely “click” as in 24. Remember, this name will be the name of the function of the button. Finally, click on connect and then, the button possesses an IBAction that can trigger a functionality.
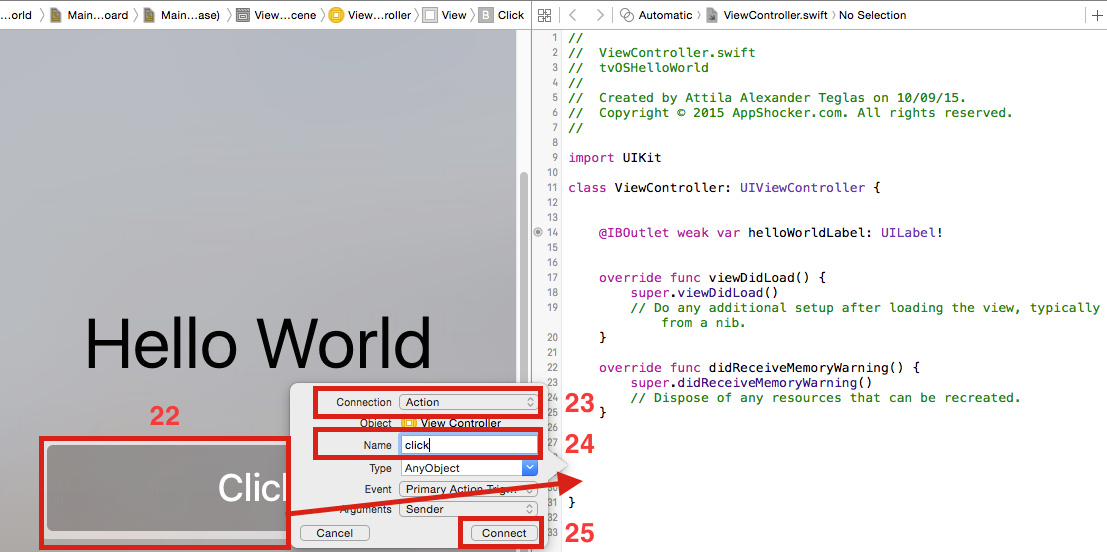
Image 19 illustrates how to create an IBAction for the button.
Now, the last part missing is to implement the functionality responsable for making the text of the lable change. And, you do this by the following:
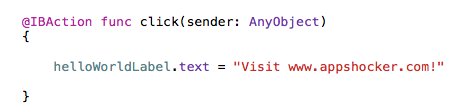
Image 20 illustrates how to change the text of a label.
Now, run the tvOS app in the tvOS Simulator and you will see this:
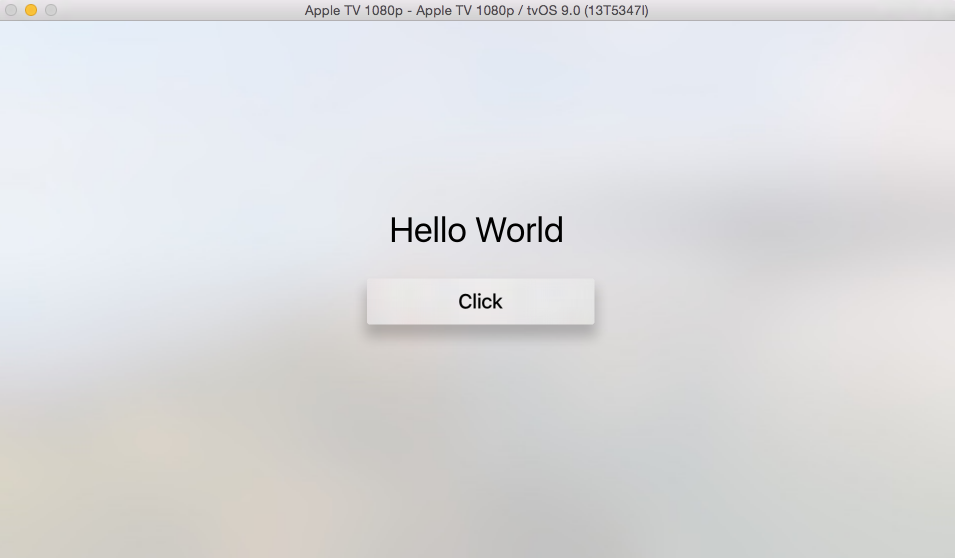
Image 21 illustrates the app with a button and a hello world label.
Here comes a major difference between the iOS Simulator and the tvOS Simulator: you trigger the button not by clicking on it via the mouse. Instead, you do this via hitting the “Enter” key of your keyboard.
When you hit the “Enter” key, you will see this:
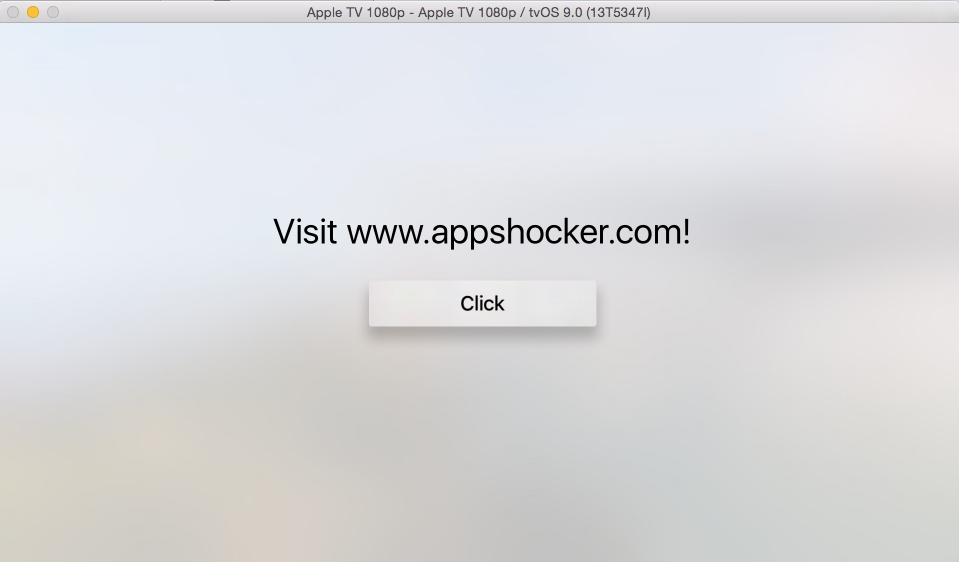
Image 22 illustrates how the label changes when button is clicked.
Voilà and now, you have a fully functional Hello World tvOS app!